
Time in Motion: How to Master Long-Exposure Photography
Capture motion. Reveal emotion. Let time be your creative tool.
What Is Long-Exposure Photography?
Long-exposure photography is the art of capturing time in a single image. By using slow shutter speeds, photographers record the movement of light and objects—transforming what the eye sees in a moment into a story told over seconds, minutes, or even hours. Motion becomes blur. Light becomes a brushstroke. The result? Dreamlike scenes—silky waterfalls, glowing traffic trails, and star paths that arc across the night sky.
At its core, long-exposure photography is about letting the camera observe more than a moment. With the shutter open longer, your sensor collects ongoing light and motion, rather than freezing a split second. That opens up a whole new visual language—one built on fluidity, abstraction, and atmosphere. Whether you’re working at dusk, night, or high noon with filters, the longer you leave that shutter open, the more surreal and cinematic your results become.
Why Use Long Exposures?
Long exposures give you creative control over time itself. It’s not just about showing a scene—it’s about showing what happened there. You can blur a rushing river into smooth serenity, stretch clouds into streaks, or erase pedestrians from a plaza. The technique simplifies chaos, amplifies emotion, and turns motion into meaning.
On a foggy Oregon beach, I shot a 60-second exposure that turned crashing surf into a sheet of glass. I’d never photographed silence before—but that image came close.
Long exposures invite you to pause, observe, and compose deliberately. They reveal what’s hidden in real-time—and they give your photography a powerful emotional dimension. If you want to elevate your visual storytelling, this is the technique.
Essential Gear for Long-Exposure Photography
You don’t need pro-level gear—but the right setup makes all the difference. Long exposures are unforgiving when it comes to stability and light control, so investing in a few key tools will give you consistent, high-quality results.
🧰 Core Tools:
For achieving stunning long exposures, a reliable setup is key. These core tools help maintain sharpness, manage light, and give you precise control over exposure time:
| Core Tool | Purpose / Why It Matters |
|---|---|
| Tripod | Ensures camera stability to prevent blur during long exposures. Choose one that matches your camera’s weight. |
| Remote Shutter Release or Self-Timer | Prevents camera shake when triggering the shutter. Essential for sharp results. |
| Neutral Density (ND) Filters | Reduce light entering the lens, allowing slow shutter speeds in daylight. Key for motion blur effects. |
| Camera with Manual & Bulb Mode | Manual gives full control; Bulb mode allows exposures longer than 30 seconds. |
| Manual Focus | Crucial when ND filters darken the viewfinder; focus manually before attaching filters. |
| Aperture Range (f/8–f/14) | Delivers sharpness across the frame—ideal for landscapes. |
| Low ISO Capability | Lower ISO = less digital noise. ISO 100–200 is ideal for clean exposures. |
📌 Field Note: Use a tripod with a center hook to hang your bag—added stability in wind or water.
Additional Helpful Tools
While not essential, these tools improve efficiency, expand creative options, and help in challenging environments:
| Tool | Benefit |
| Lens Cleaning Kit | Keeps lenses dust- and smudge-free. Essential for long-exposure clarity. |
| Extra Batteries | Long exposures and cold weather drain batteries fast—bring spares. |
| Weather Protection | Rain covers or wraps protect gear during extended outdoor sessions. |
| Intervalometer | Enables automated long exposures or stacking (e.g., for star trails). |
| Leveling Base or Ball Head with Bubble Level | Ensures perfectly straight horizons—especially in minimalist seascapes. |
This setup turns your camera from a snapshot machine into a time-shaping tool.
Mastering Long Exposure Settings
Long-exposure photography isn’t just gear—it’s control. And that starts with understanding the exposure triangle: shutter speed, aperture, and ISO. Get these three in sync, and your images will not only look technically solid but visually compelling.
⏱️ Shutter Speed
Controls how long your sensor records light. Longer = more motion captured.
- 1–10 sec: Flowing water, moving traffic, soft clouds
- 10–30 sec: Waterfalls, city lights, dramatic cloud movement
- 1+ min: Star trails, minimalist water scenes, ultra-smooth effects
🔘 Aperture (f-stop)
Affects light and depth of field.
- f/8–f/11: Sharp landscapes
- f/2.8–f/5.6: Brighter exposure, shallow depth
🎚️ ISO
Start low (ISO 100 or 200) to minimize noise. Boost only in extreme low light.
🌟 Make It Click: Think of shutter speed as a volume knob for motion—how loud do you want time to speak in your photo?
Balance is the key. Don’t just crank one setting—understand how they interact, especially when adding ND filters into the mix.
Using ND Filters for Daytime Long Exposures
ND filters are your creative superpower. Without them, shooting a long exposure during the day would just blow out your image. ND filters reduce the light entering your lens, letting you use slower shutter speeds in full sun.
Each filter strength is measured in “stops”—each stop cuts light in half. Here’s a quick guide:
| Filter | Stops | Best Use |
|---|---|---|
| ND8 | 3 | Great for golden hour or overcast days; adds subtle motion blur to water or clouds without making the image too dark. |
| ND64 | 6 | A versatile mid-strength filter—perfect for soft water, traffic trails, and cloudy daylight scenes without overexposing. |
| ND1000 | 10 | The go-to for dramatic long exposures in bright sunlight. Ideal for 30+ second shots of seascapes, waterfalls, and cloud streaks. |
Want to balance a bright sky and darker land? Graduated ND filters help even out exposure. Need flexibility? Variable ND filters adjust on the fly—but may cause vignetting or color shifts at extremes.
This table isn’t exhaustive, but it covers the go-to ND filters that most photographers use 90% of the time. If you’re shooting in harsh midday light or want more extreme blur, you may reach for 12–15 stop filters. For precision or more nuanced lighting, variable NDs or graduated filters may fit better. Think of this as your quick-start guide—once you’re comfortable, experiment with other strengths to expand your creative range.
📌 Field Note: Compose and focus first. Then apply the ND filter and recalculate exposure time. Once it’s on, you won’t see much through the viewfinder—so planning ahead matters.
Setting Up Your Shot: A Repeatable Process
Long-exposure success starts before you press the shutter. Here’s a reliable, step-by-step setup that sets you up for quality and repeatability:
- Choose a scene with motion – flowing water, drifting clouds, passing lights.
- Set up and stabilize your tripod – no wobble, level surface.
- Compose and focus – use Live View, zoom in to nail focus.
- Dial in base settings – f/8, ISO 100, rough shutter time.
- Attach ND filter – then recalculate shutter using an app or chart.
- Trigger with remote or timer – avoid touching the camera.
- Review results – zoom in, check histogram, and adjust if needed.
This checklist gives you structure so you can focus on creativity instead of fumbling with settings.
Creative Techniques to Explore
Once you’ve mastered the settings, long-exposure photography becomes your creative playground.
Long exposures aren’t just about getting silky water or night sky shots—they’re a way to express motion, emotion, and abstraction. Below are several techniques, each with a purpose, a recommended setup, and a few real-world pointers to get the most out of each.
🌊 Moving Water
Water is one of the most classic and satisfying subjects for long exposures.
- Why it works: Long shutter speeds smooth turbulence, creating a soft, flowing effect that feels serene and surreal.
- Shutter suggestions:
- 1–2 seconds: Retain texture (great for creeks or fast-flowing rivers)
- 10–30 seconds: Fully smooth water surfaces for a foggy or glassy look
- Ideal conditions: Overcast days or golden hour—avoid harsh sunlight unless you’re using a strong ND filter (ND64 or ND1000)
🧠 Insight: A 10-second exposure on a stormy day can transform chaos into calm. It’s not just what you see—it’s what you feel.
🚗 Light Trails
Capture the flow of headlights, taillights, and neon—turn traffic into energy.
- Best times: Blue hour or nighttime when ambient light balances with the brightness of car lights
- Shutter suggestions:
- 5–30 seconds: Depends on traffic speed and density
- Tips:
- Look for overpasses or intersections with curves for dynamic compositions
- Use manual focus on a bright point (like a streetlight) and lock it in
🔦 Pro Tip: Try shooting at f/8 with a 10-second shutter at ISO 100. Adjust from there based on exposure and traffic flow.
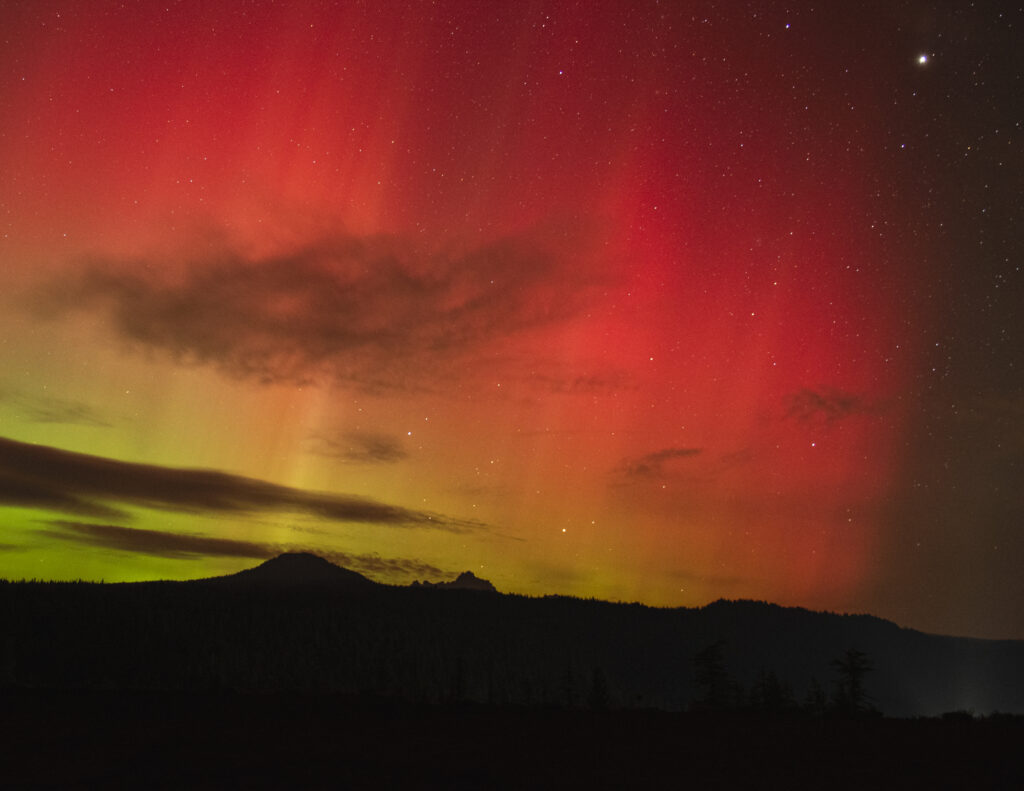
🌌 Star Trails
Turn the night sky into circular or streaked trails using extreme long exposures.
- Methods:
- Single exposure: Bulb mode for 15–60 minutes (use ND if needed)
- Stacking method: Combine 30-second exposures in post (avoids sensor noise and hot pixels)
- Essential gear: Tripod, intervalometer, and preferably a full-frame camera with good low-light performance
- Focus tip: Manually focus on a bright star using live view and digital zoom
🖌️ Creative Tip: Aim north (or south in the Southern Hemisphere) to create circular trails centered around Polaris or the Southern Cross.
🌀 Intentional Camera Movement (ICM)
Break the rules on purpose—move the camera during the exposure.
- Why it works: Creates abstract, painterly results by blurring form and color
- Shutter suggestions: 0.5 to 2 seconds for best results
- Common movements:
- Vertical pan through trees for a watercolor forest effect
- Lateral pan across city lights for futuristic streaks
- Camera twists or swirls for chaotic energy
🖌️ Creative Tip: Use a low ISO and small aperture (f/11–f/16) in daylight to get slower shutter speeds without filters.
🎨 Light Painting
Use handheld light sources to paint shapes, outlines, or illuminate parts of a scene during a long exposure.
- Tools: LED wands, flashlights, steel wool, glow sticks, or smartphone screens
- When to shoot: Total darkness is best—urban light pollution can dilute the effect
- Shutter suggestions: 10–60 seconds, depending on the complexity of your “paint”
🎯 Focus Before You Paint: Set your focus and composition before turning off your light source and triggering the exposure.
🌫️ Minimalist Seascapes or Cloudscapes
Use ultra-long exposures (1–5+ minutes) to smooth out waves or streak clouds across the sky.
- Best gear: ND1000 or ND32000 for daytime shots
- Ideal conditions: Windy skies or repetitive waves to get uniform motion
- Why it works: Reduces visual noise, emphasizes simplicity and space
🖼️ Creative Note: These images pair beautifully with minimal composition—just a horizon, a structure, or a lone rock.
🛠️ Experiment, Iterate, Evolve
The magic of long-exposure photography lies in the unseen. You’re not capturing what you see—you’re capturing what time reveals.
🧠 Insight: “Let motion be your medium. The gear is your brush. The shutter is your window to a world the eye can’t see.”
Post-Processing Your Long Exposures
Editing brings your long-exposure images to life. You’ve captured time—now reveal it with clarity and contrast.
- White Balance: ND filters can create warm or cool color shifts—correct as needed.
- Highlights/Shadows: Emphasize the motion and drama.
- Noise Reduction: Use sparingly to keep texture while cleaning up hot pixels or digital grain.
- Local Adjustments: Use radial or graduated filters to spotlight motion areas like water or clouds.
- Clarity & Texture: Subtle boosts or softening can steer the mood.
Experiment. Long exposures respond beautifully to thoughtful post work.
Common Challenges & Quick Fixes
Even with planning, long exposures can present unique challenges. Here’s how to recognize and resolve the most common problems in the field or during post-processing:
| Issue | Quick Fix |
| Camera shake | Use a remote shutter release and ensure tripod is stable—hang your bag from the center column for added weight. |
| Overexposed image | Use a stronger ND filter or reduce aperture (higher f-stop number) to let in less light. |
| Color cast | ND filters may add a warm or cool tint—correct this in post with white balance adjustments. |
| Hot pixels | Enable long-exposure noise reduction in-camera or clean them up in Lightroom using spot healing. |
| Fogged lens | Use anti-fog wipes and give your gear time to acclimate to temperature changes. |
🔋 Pro Tip: Cold weather kills batteries fast. Keep extras in your coat pocket to stay warm and ready.
🌟 Make It Click: Long exposures aren’t forgiving—a wobbly tripod or missed focus can ruin the shot. Lock in stability first and check your histogram often.
Staying Safe & Shooting Responsibly
Long-exposure photography often takes you off the beaten path—or into the dark. Plan ahead:
- Tell someone where you’re shooting.
- Bring headlamps, layers, and backup batteries.
- Respect nature—stay on trails, don’t disturb rocks or wildlife.
- Follow park rules, respect property lines, and check for drone restrictions.
Great shots don’t need to come at the cost of ethics or safety.
Next Steps: Learn, Practice, Connect
Ready to grow your skills? Tap into these tools and communities.
🧠 Study the Masters:
- Alexey Titarenko – Known for motion blur and mood-rich work like his “City of Shadows” series
- Radek Standera – Captures light trails in forest roads and moving vehicles
- Leanne Cole – Fine art photographer who teaches and inspires through her long exposure work
- Brian Akerson – Long-exposure and time-lapse expert, known for waterfalls and early 2000s techniques
- Esther Bunning – Artistic, thought-provoking imagery using long exposure methods
- Hiroshi Sugimoto – Uses long exposure to explore memory and time, especially in his seascapes
- George Digalakis, Marc Koegel, Marco Maljaars – Top three winners of the 2019 Long Exposure Photographer of the Year awards
- Thibault Roland – Specializes in fine art black-and-white long exposure
- Rach Stewart, Marco Grassi, Brent Purcell – Known for patience, composition, and moody long exposures
- Cath Simard – Renowned for powerful editing and surreal composite work
- Sarah Alsayegh, Grayson Kemp, Matt Stirn, Tiffany Sutton – Explore unique techniques: dramatic clouds, astrophotography, light painting, and scientific creativity
🌍 Online Communities
- r/longexposure (Reddit): Real-time tips, discussions, and feedback from hobbyists to pros.
- Flickr Long Exposure Group: Rich inspiration and a sharing hub for a tight-knit community.
- 500px #LongExposure Tag: Showcase your best shots to a photography-savvy audience.
- Instagram #LongExposureShots: Quick visual hits and global connections via stunning images.
- Vero Long Exposure Channels (Search “Long Exposure” in-app): Curated, ad-free space for artistic photo sharing.
🧰 Helpful Tools
- PhotoPills: Plan exposures, light, and stars with ND and celestial tools.
- NDTimer App: Fast shutter speed calculations with a filter timer (iOS).
- Lee Filters App: ND exposure calculator for iOS and Android stacks.
- The Photographer’s Ephemeris (TPE): Time sunrise and twilight for perfect landscape shots.
- Dark Sky Finder: Find dark skies for night exposures, web-based.
🎓 Learn by Doing
- Local Photo Walks: Join groups via Meetup.com or Facebook for hands-on practice.
- Online Courses: Dive into Skillshare, CreativeLive, or YouTube for guided lessons.
- 10-Stop ND Filter Challenge: Experiment with extreme daytime exposures.
- National Parks at Night Webinars: Learn night techniques in virtual sessions.
- Time-Lapse Tool: Build time-lapses from long exposures with ease.
🎨 Let Time Be Your Canvas
Long exposures defy the ordinary. Twist on your ND, crank the seconds, and watch chaos turn calm—raging waves soften, headlights streak, crowds dissolve. It’s your shot, your rhythm. Play with filters, dodge the shake, and break the mold of frozen frames.
Gear on. Shutter wide. Rewrite reality.
📦 Ready to gear up?
Top ND Filters for Long Exposures
- Lee Filters – ProGlass IRND Series: Premium glass filters, 2 to 15 stops (e.g., 6-stop Little Stopper, 10-stop Big Stopper). Blocks infrared and UV for true color neutrality—twist on your ND via a 100mm holder and watch daylight turn to dreamscapes with zero cast.
- Breakthrough Photography – X4 ND Series: Ultra-sharp, nano-coated glass, 3 to 15 stops (6 and 10-stop are standouts). Twist on your ND and get edge-to-edge clarity—weather-sealed for rugged shoots, perfect for waterfalls or starry nights.
- Hoya – PROND Series: High-quality round filters, 1 to 10 stops (PROND 64 = 6 stops, PROND 1000 = 10 stops). Screw it on, twist on your ND vibe, and enjoy minimal color shift—great for quick setups and crisp long exposures.
- NiSi – Nano IR ND Series: Square or round options, 3 to 15 stops (10-stop is a bestseller). Twist on your ND with a holder or threads—optical glass cuts IR for pure tones, ideal for coastal blurs or urban light trails.
- K&F Concept – Nano-X ND Series: Budget-friendly yet solid, 2 to 10 stops (ND1000 = 10 stops). Twist on your ND and stack if needed—multi-coated glass resists scratches, a steal for silky rivers or cloud streaks on a dime.
Top Tripods for Long Exposures
- Manfrotto – Element Series: Compact aluminum or carbon fiber tripods, typically 3-4 lbs, supporting 13-17 lbs. Twist on your ND and rely on twist locks and a sturdy ball head for shake-free shots—ideal for travel or rugged outdoor blurs like waterfalls or dusk skies.
- Benro – Aero Travel Series: Lightweight aluminum or carbon options, around 3-4 lbs, holding 15-20 lbs, often with a reversible column. Twist on your ND and pack it small—perfect for steady star trails or coastal long exposures on the go.
- Vanguard – Alta Pro Series: Robust aluminum tripods, 4-5 lbs, supporting 15-18 lbs, featuring a multi-angle center column. Twist on your ND and adjust for low river shots or high cloud streaks—built for versatility and rock-solid long exposure work.
- K&F Concept – Lightweight Carbon Fiber Tripods: Sleek carbon fiber builds, often 2.5-3 lbs, holding 15-20 lbs, with quick-release legs. Twist on your ND and cut vibration for crisp nightscapes or silky daytime scenes—great for portability without sacrificing strength.
- Neewer – Aluminum Tripod/Monopod Combos: Affordable aluminum models, 4-5 lbs, supporting 20-26 lbs, convertible to monopods. Twist on your ND and shoot steady in any condition—budget-friendly stability for urban light trails or windy landscapes.